Showing posts with label step by step. Show all posts

Tuesday, November 15, 2011

Bacon!

I am a big fan of bacon (& so is my sweetie). But since I’ve started DD, I’ve had to switch to turkey bacon. Yes, I know it’s not the same but I do get my bacon fix. This morning I made bacon and eggs in the oven. It was pretty simple. I used a cupcake pan and 2 pieces of bacon. One to go around and the second one I cut in half and did an x. I broke the egg and then placed the overlapping pieces over the egg. It was in the oven for about 15 min (I think, my mornings are slow so maybe it was less). I don’t like the eggs runny so I made sure they were cooked all the way by sticking a toothpick in it.  


This is with regular bacon (for him). 
Here are a few other bacon dishes from the past few months:

Jalapeno pepper wrapped in bacon (this was real bacon, the leanest we could find but you can substitute with turkey bacon) and cream cheese filling. Here is a link to the recipe from the Pioneer woman (love her recipes!). It’s perfect if you love spicy, crunchy and cheesy all together! Yum! 


Be careful with this bacon man log, it can give you a heart attack! Unless you substitute for turkey bacon and ground turkey instead of ground sausage. My sweetie found this and wanted me to make it for him. He enjoyed it! I found this recipe from Baked Bree,
I hoped you've enjoyed this!

DD Friendly: Spicy BBQ Chicken Patties & Easy Sushi

Here is what was on my plate today:

Spicy BBQ Chicken Patties
These were pretty simple to make and super yummy!
Here is what I used:
1lb ground chicken
Bbq sauce
Chili garlic sauce
2 eggs
1/3 c cheese

I added everything together and dropped them into a pan. You can also bake them in the oven if you want.  After they were done, I just added some cheese. It would have been better with veggies but today was protein day for me. 


Easy Sushi
This was extremely easy!
You can use canned fish if you want; I used fresh fish (don’t remember what it was called but my sweetie caught it :D ). I took out the bones and forked the meat a little bit and heated it. Then I just placed it on the sea weed wrap and rolled it. That’s about it. You are welcome to add veggies, I just forgot. I used ginger and low sodium soy sauce. Enjoy!

Thursday, November 10, 2011

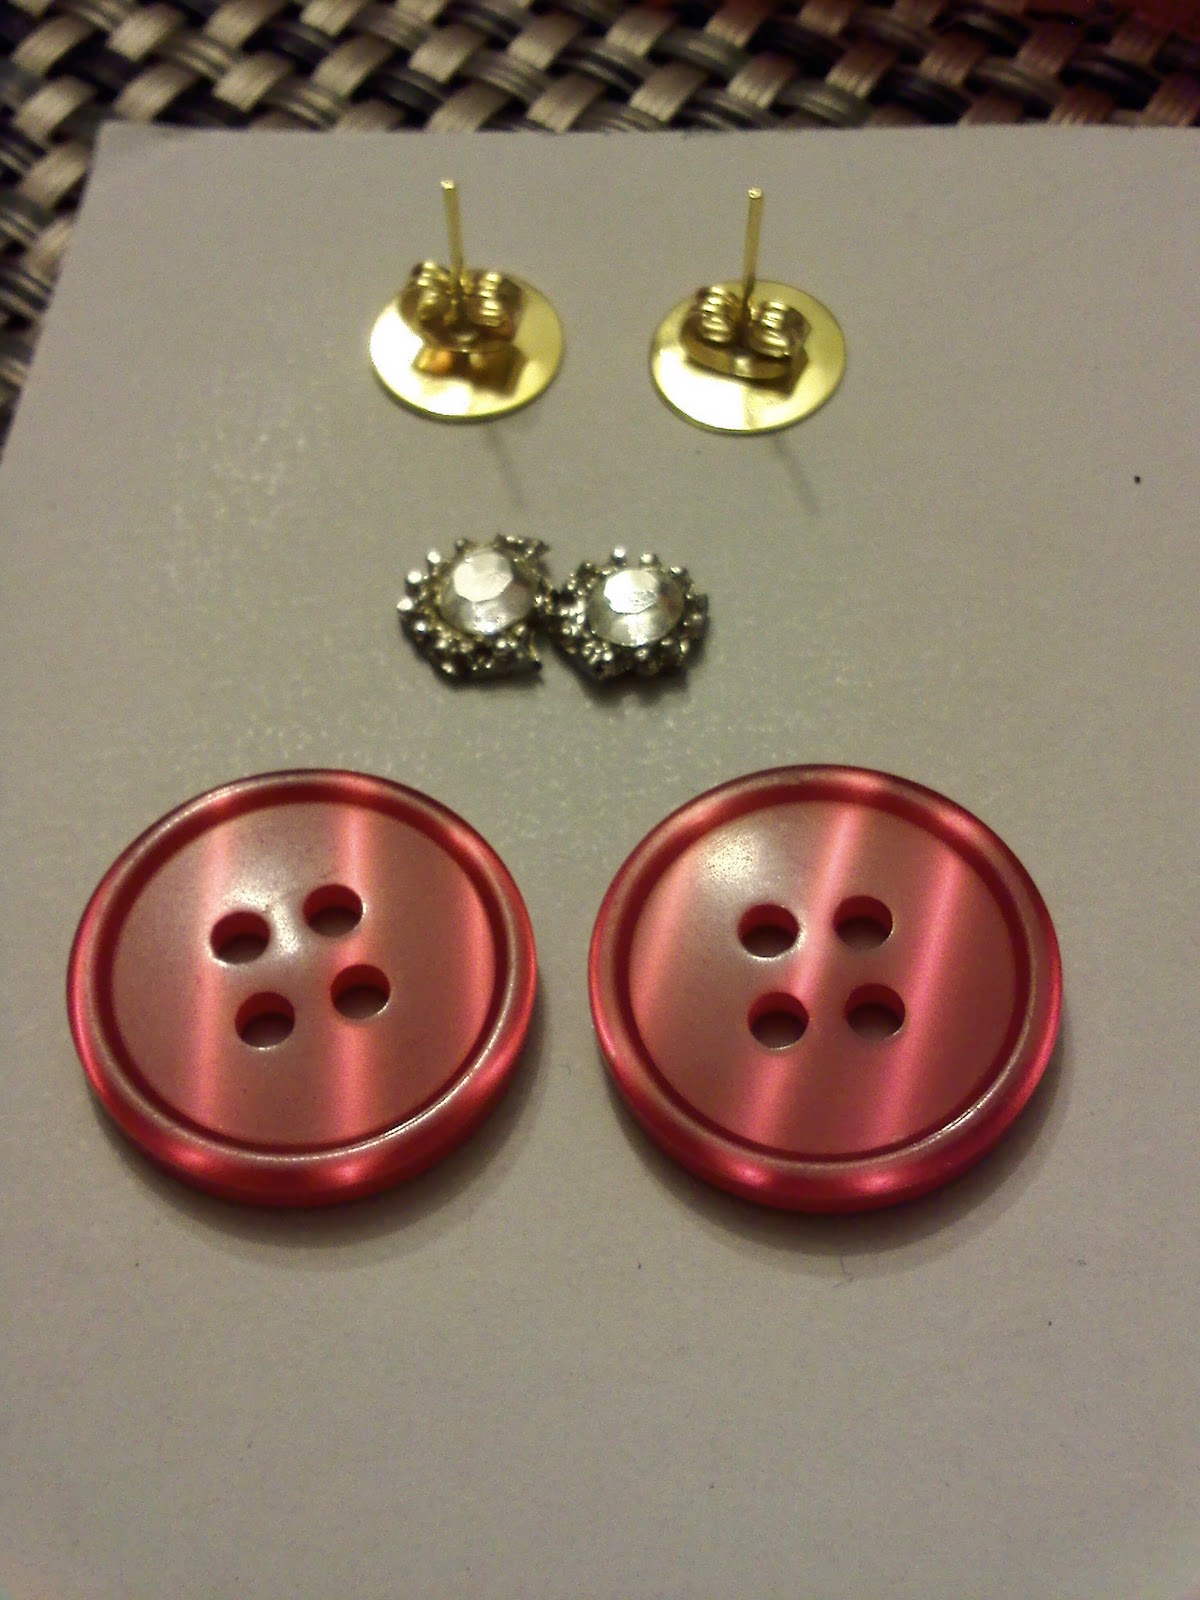
Christmas Button Earrings

No, I promise I have not forgotten about thanksgiving and fall. I will come back to it; I promise I have something planned. But these turned out way better and easier than I thought they would.
Here is what you need:
earrings
buttons
jewels 
glue gun (if you want a super strong hold, you can use E6000 )

 Glue the top and hold, glue bottom and hold.
 How simple was that?

I hope you enjoyed this quick tutorial :)

Sunday, November 6, 2011

Sugar Free: Strawberry Crumb Pie

I have not been posting as much as I have been wanting to. I've just been a bit busy lately but I promise that this recipe is the best pie I've ever made. I hope you like it too!


Crumb crust:
1/3 c. brown sugar splenda
1/4 c. splenda or preffered sweetener
1 teaspoon cinnamon
1/8 teaspoon nutmeg
1/2 c. melted butter
1 1/3 c. all purpose flour or whole wheat


Strawberry filling:
1 lb frozen strawberries (you are welcome to add more)
1 Tablespoon water
1 Tablespoon lemon juice
1 Tablespoon unflavored gelatin (I preffer Knox, it is already measured to 1 tablespoon)
1 c. splenda/ sweetener
pinch salt


Quick Directions:

  • In a bowl, combine lemon juice, water and gelatin. Stir a little until it dissolves and let sit for 5 minutes. 
  • Cook strawberries on stove for a few minutes. Add splenda, gelatin mixture and salt. Let simmer for about 2 minutes. Once the two minutes are up, let cool for 30.
  • Combine flour, nutmeg, cinnamon and sugar. Add butter. The end result will be very crumbly.
  • Scoop a few tablespoons of crust into cupcake pan or one pie pan. Press it down just a little bit (or a lot if you want a less crumbly crust). Add strawberries.
  • Bake at 350F for 20-23 min or until crust is ready.
  • Refrigerate for a few hours (2-4 or over night).

I hope you enjoy it! Let me know how it turns out.  

Monday, October 31, 2011

Hair Accessories Tutorial

Good Morning Sunshine!
Astrid


I hope that you have had a wonderful, relaxing weekend. Mondays can be 'blah' and hard to get back into the routine of a busy week. It's not all gray and sad, there is SUNSHINE (that you can wear in your hair!). I promise it will make you feel better, so SMILE! 


Here are your materials: 
Thread & needle
glue gun
hair clip
bead or button 
yellow fabric
black ribbon 
non slip grip pad (is usually used under a rug)
white fabric square (preferably thick)


Step by step:

Step 1: Fold and cut fabric until you have squares. Trim around the corners to make them round.
Step 2: Fold the circle twice to resemble a triangle and stitch the pointed tip to the center of your white square. Then repeat on the opposite side. After you have four (make sure the tips don't overlap), add four more on top (trim them down just a bit or a lot )
Step 3: Tread a bead or button into the center.


Step 4: Glue your ribbon onto the clip. You can put ribbon around the entire clip or just the top part.
Step 5:  Glue the non slip grip strip under the top piece. 
Step 6: You can continue to add one on the bottom (optional).
Step 7: Glue the clip onto the backside of your flower.


Ta Da! 
All done. I hope I did not fail to mention anything. If you have any questions, let me know and I will try my best to answer them. Which is your favorite? I love the button version better. Heads up: watch for my first GIVEAWAY at the end of the week. Enjoy the rest of your Monday!
I love putting it on my belt :)